|
Building & Flying Micro & Mini Antique & Old Timer Models |
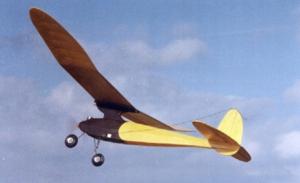
Small Old Timers |
|
SmallOldTimers.com |
|
|
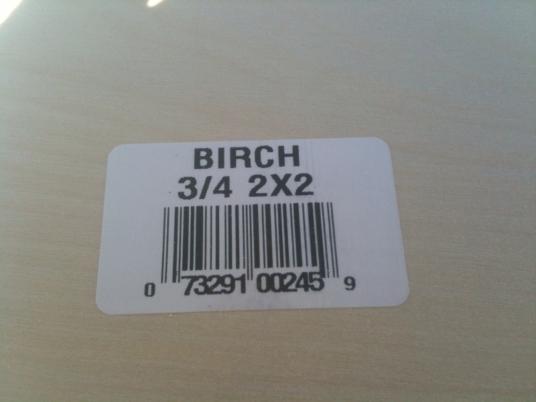
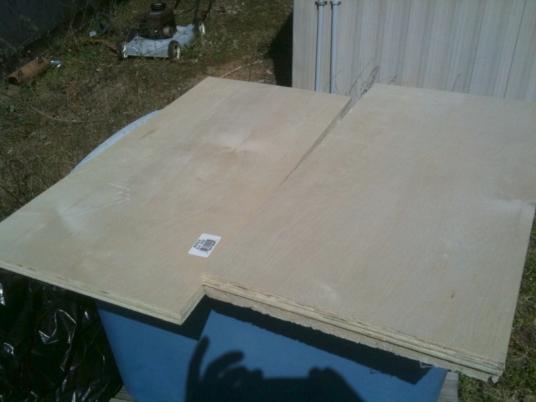
Session #2 May 28, 2010 Well as you can see, a lot of time has passed since I started. I regret that I did not chronicle the build in its entirety, but work and other things cause me to put it on the back burner. Since last February, I decided to do a lot of research on the "SMALL" thing and so I setup this web site, and now we have a Yahoo group for SmallOldtimers. I have had a lot of email from folks who have similar interests so I hope this site and the forum evolves into something that will give a lot of enjoyment to a lot of folks. Going On.... Well though I did not put everything in pictures, I DO have several so I will attempt to put together a build for you here. Getting Started.... For many years, I have used my own type of building board. I normally use some really straight 3X4" birch plywood topped with a piece of ceiling tile to pin things down on. I usually use a piece of 2'X4" ply. For this build however since it is so small, I went another route. I drove to the local home improvement center and got a 2'X2" piece of birch to cut the panel from.
I then took the panel to my table saw and split it into 2 12" x 2" pieces.
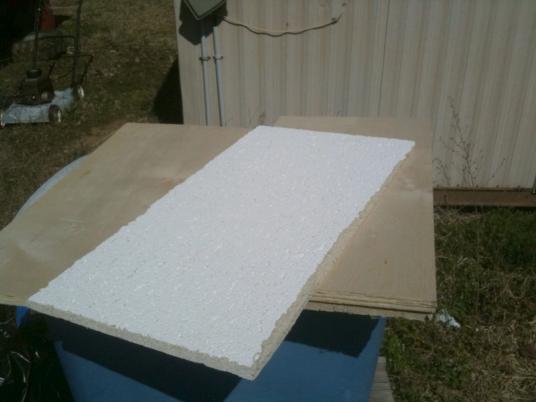
Next I took a 2'X4" ceiling tile I got from the local lumber yard and cut it to the same size. One note here is that you usually have to buy an entire pack of the tiles that can get very expensive. I went to the clerk told him what I was doing, and asked if they possibly had any broken packages he would sell me a single tile or two out of. He went into the back and found a broken bale with 2 good tiles in it. I got them for $1 each thanking him profusely!! I used my utility knife and cut off a 12" X 2" piece for the building board.
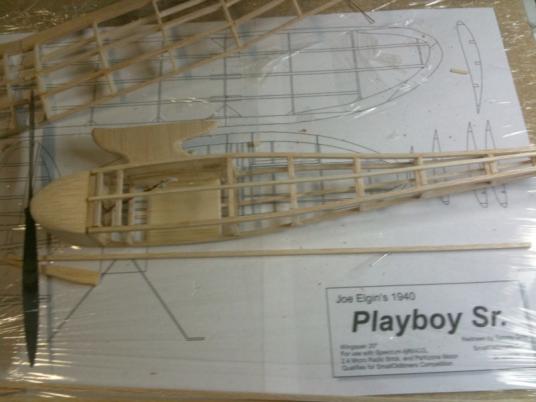
I turned the tile white side in, and left the smoother backside up for the building board. I then took saran wrap and wrapped the while thing together into a building board. I next took the plans I had earlier printed out on the computer and put them on the board. I also wrapped the plans to the board so I had a unit that consisted of the board, the tile and the plans all protected with the plastic wrap ready to start building. Here is where the gap is.... I built the fuselage, and wing before I continued this blog, but I did get a few pictures along the way. Next here is a picture of the fuselage (a very bad one I had to take with my cell phone as the batteries had gone dead in the camera...Sorry for the quality)
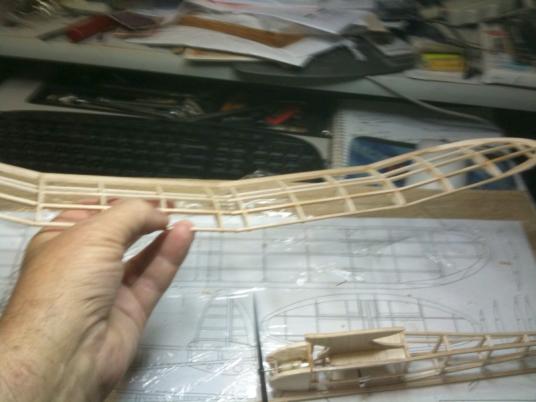
Here is the wing with my hand in the shot to give it a little perspective as to the size of the thing.
Well that is it for now! More to come! Click Here for the Next Session.. Or click at the top of the page for the main menu.
| |||||||||||||||||||||
|